self-host your own GPT at home with almost zero configuration
A few weeks ago, or maybe it was months—I decided to give my old MacBook a second life. I hadn’t used it in ages, but it had been sitting on my desk for nearly a year. I couldn’t bring myself to get rid of it. Even though it wasn’t super useful in the 2025, it gave me a ton of happy memories. I love experimenting, and this machine allowed me to try out all kinds of things (well, whatever was possible with its specs, lol).
Anyway, I decided to give it one last purpose. It’s an Intel i5 MacBook from 2016 with 256GB of disk space and 8GB of RAM. No dedicated GPU, obviously.
And what’s a better use for an old computer than turning it into a server?

That’s right—I built a home server using Proxmox, Tailscale for managing SSH connections, and certificates to make things secure. This setup lets me access it from anywhere. Pretty cool, right?
Now, when it comes to services, I wanted to install a few things like Jellyfin and Immich for managing my photos in the cloud. But, with only ~256GB of disk space, I realized I couldn’t store everything. So I came up with a different plan…
I decided to run my own GPT model at home, so I could access it whenever I wanted—and the best part? I wouldn’t have to share any sensitive information because everything would be hosted on my server. Unless someone hacked me, of course.
So why am I writing this? After sharing about my home lab on my WhatsApp status, a bunch of people asked me how I did it. And the answer is: Docker. Yes, Docker!
A lot of people probably think they need to build a server from scratch to run their own GPT, but that’s not true!
The server is just a computer, my friend. I used Docker to run both the frontend and the backend of my home GPT.
Let’s get straight to the point.
The Stack You Need
Docker: Everything will be containerized.
Ollama: This will be the backend of your app.
Open-WebUI: This is the frontend for your app.
I’m assuming you already have Docker installed, but if you don’t, check out the Docker Installation Guide. After that, make sure your Docker engine is up and running.
Running Ollama
First things first: Ollama. Just a heads-up—running large language models (LLMs) works best with GPUs, not CPUs. So if you’re using only a CPU, expect slower response times. But hey, it still works!
Here’s how you run Ollama with Docker:
CPU-Only:
docker run -d -v ollama:/root/.ollama -p 11434:11434 --name ollama ollama/ollama
Nvidia GPU:
If you have an Nvidia GPU, you need to install the Nvidia Container Toolkit first. Then you can run Ollama with this command:
docker run -d --gpus=all -v ollama:/root/.ollama -p 11434:11434 --name ollama ollama/ollamaAfter this, you’ll be able to run models inside the container!
Installing Open-WebUI
Next up: Open-WebUI. This will let you connect to Ollama, download models, and interact with them.
There are a lot of options for configuring Open-WebUI, but I’ll show you how I did it. You can explore the rest of the options on your own.
Pull the Open-WebUI Image:
docker pull ghcr.io/open-webui/open-webui:mainRun Open-WebUI:
docker run -d -p 3000:8080 -v open-webui:/app/backend/data --name open-webui ghcr.io/open-webui/open-webui:main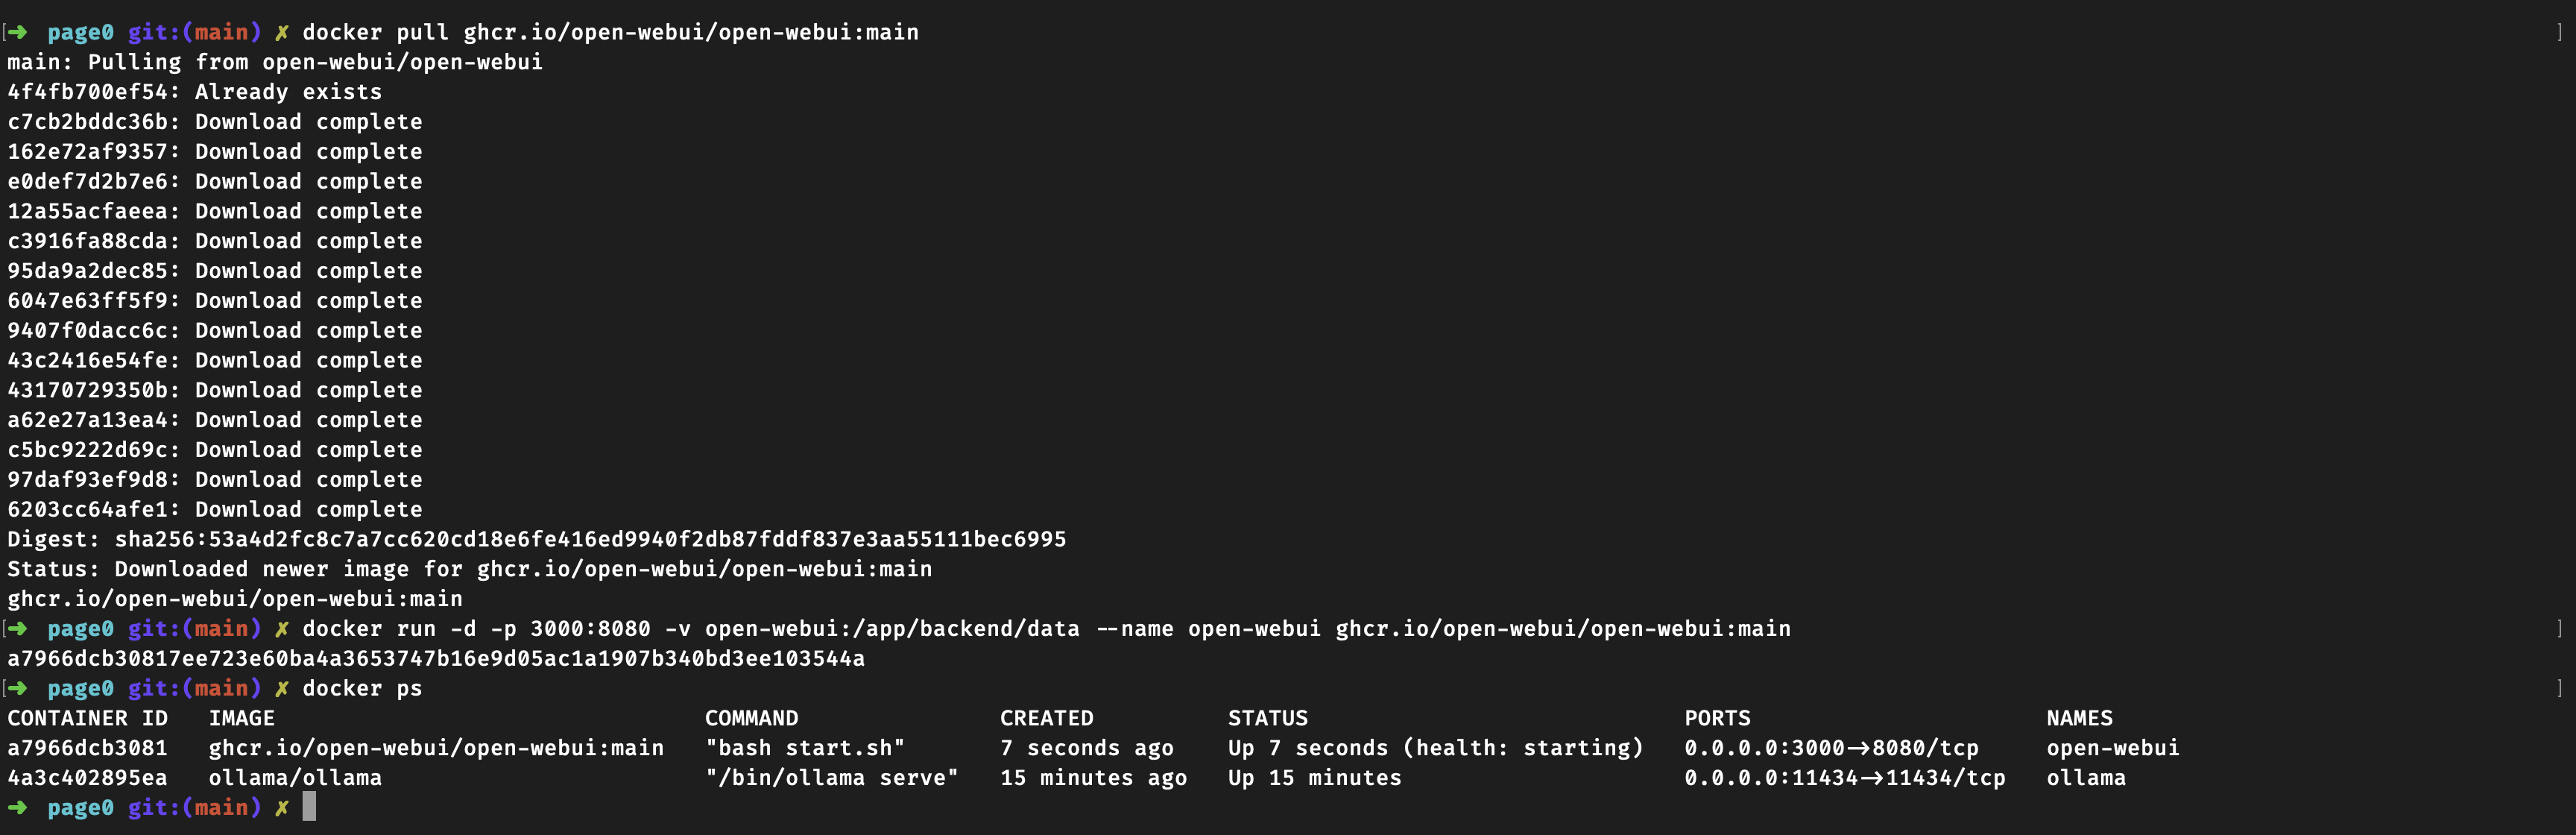
Now you should be able to access the UI in your browser by going to: http://localhost:3000 .
Setting Up Models
Once the UI is running, it’ll guide you through the account creation process. After that, head to: http://localhost:3000/admin/settings/models
You’ll see a button to download models. Just click the download icon, enter the name of the model you want, and let it download.
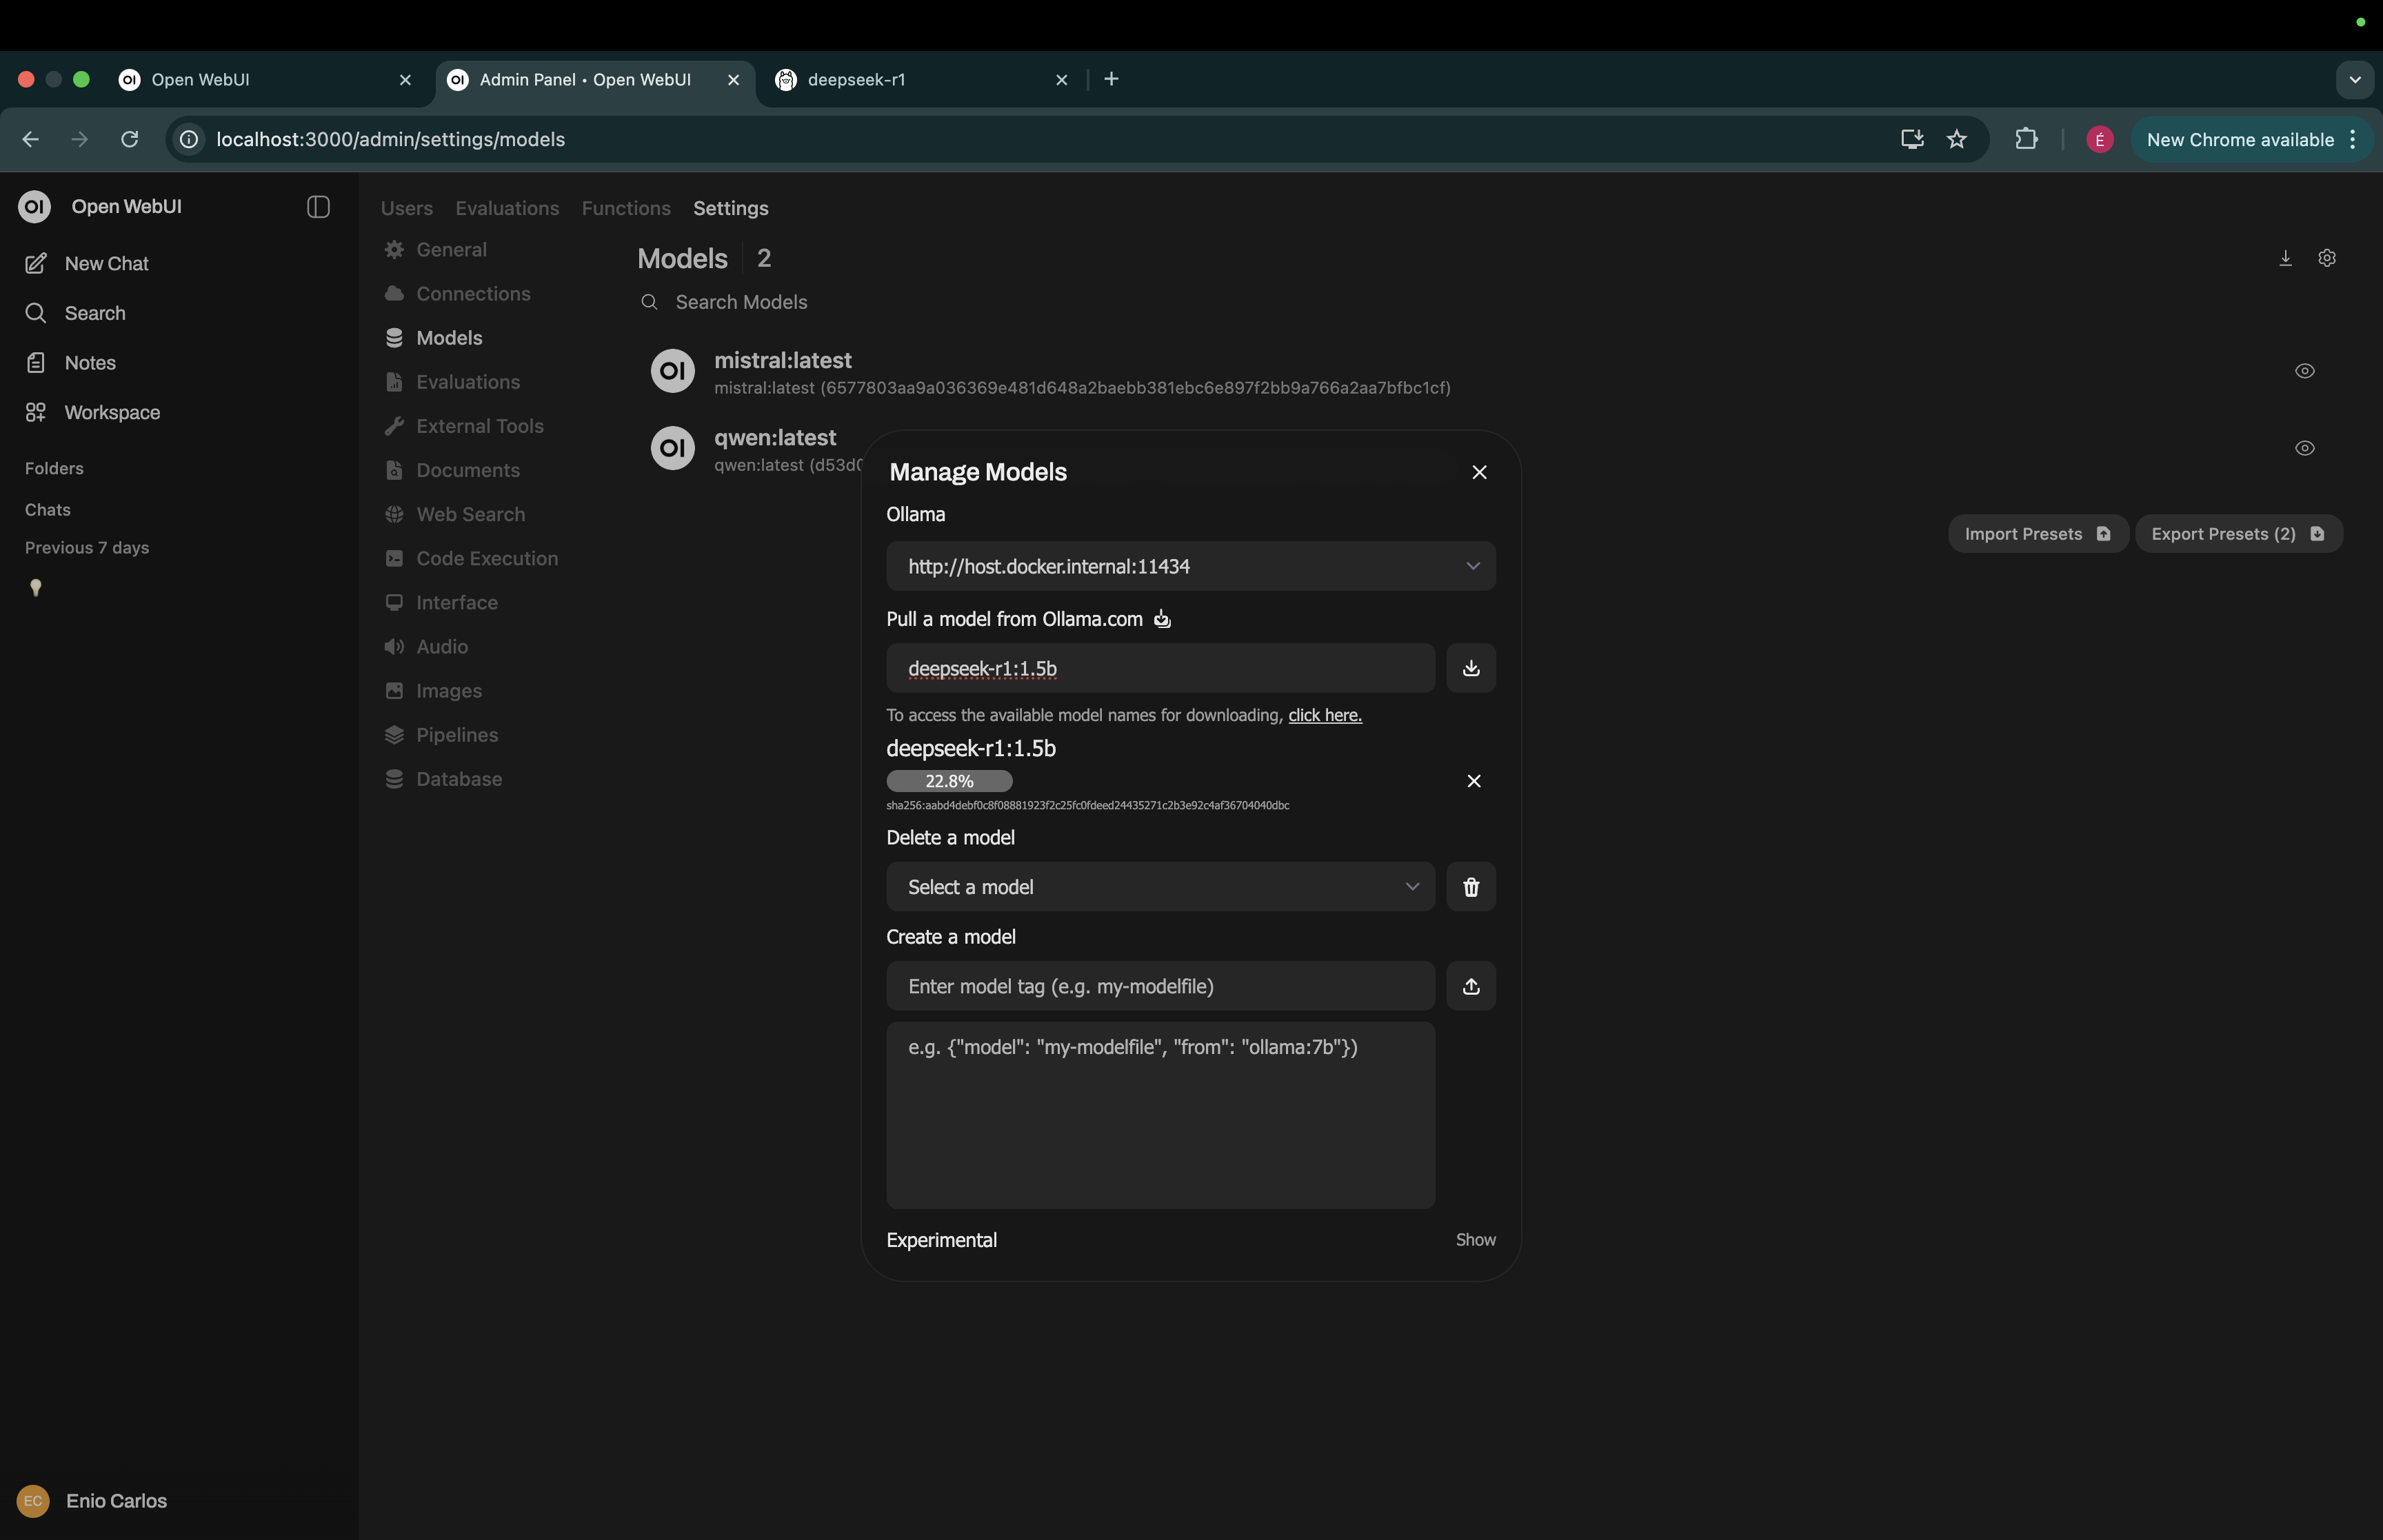
Choosing the Model
There’s a huge library of models you can download for free at Ollama’s model library: https://ollama.com/library
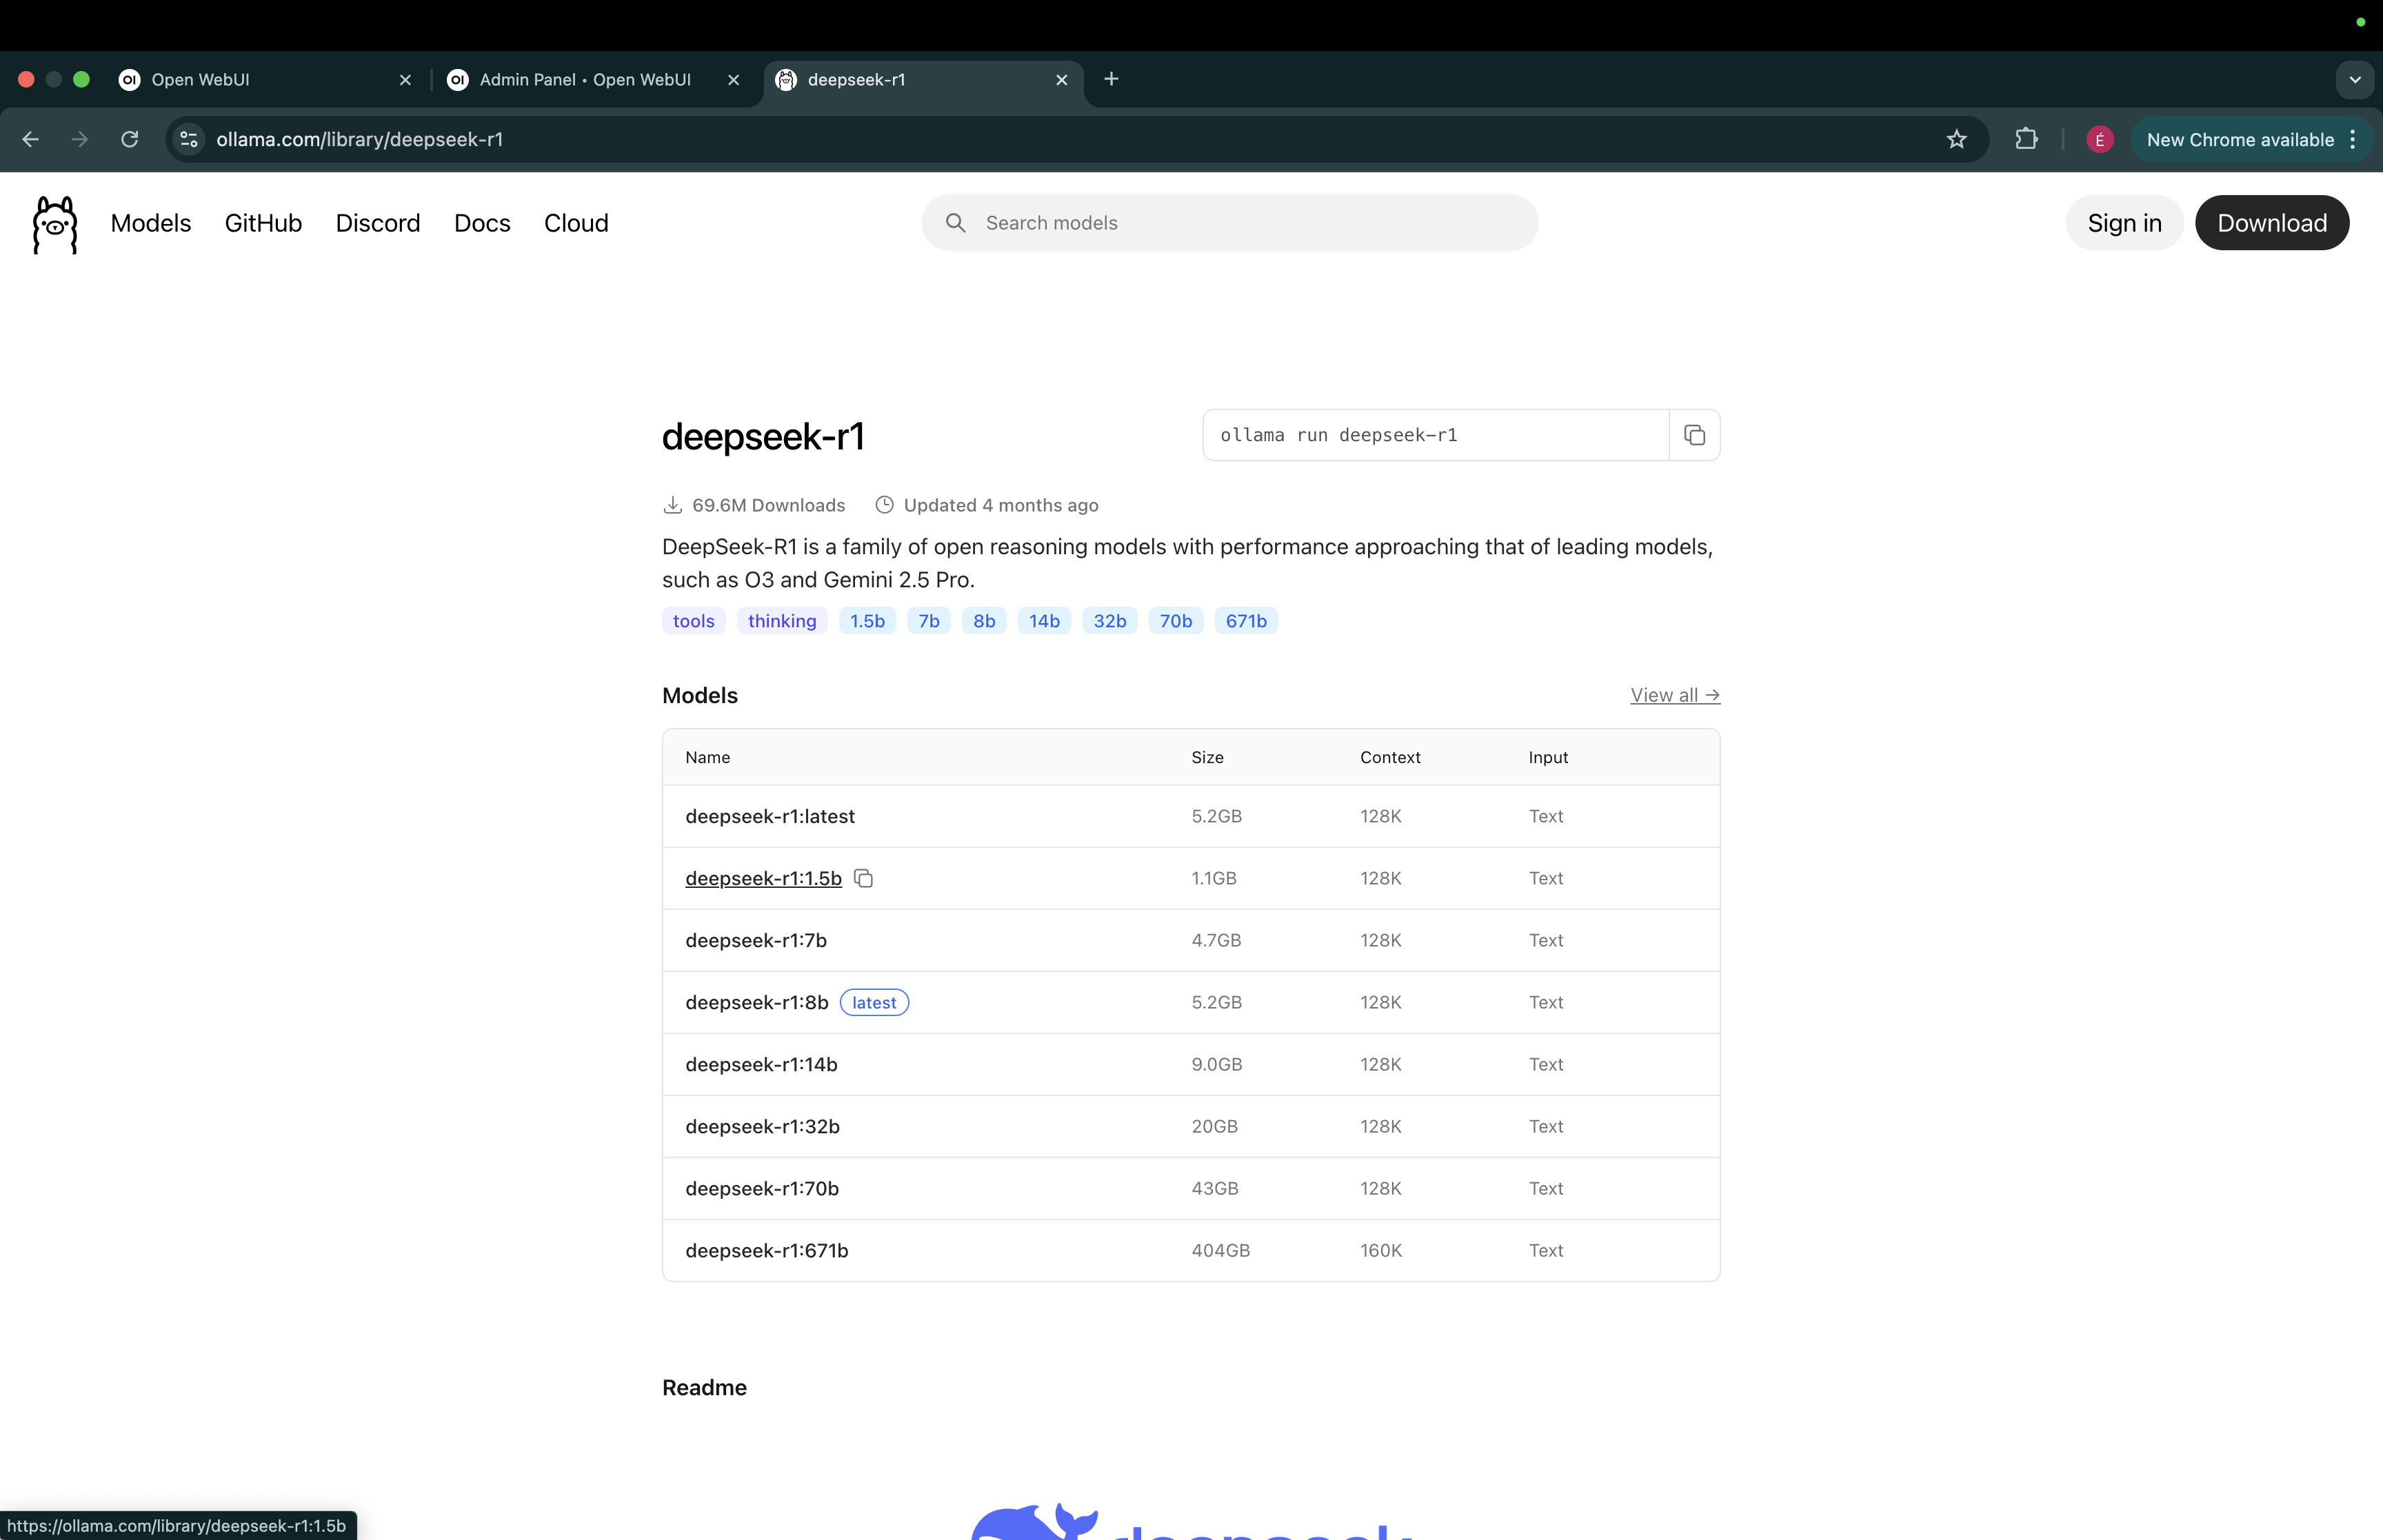
Pick the model you want, go back to Open-WebUI, enter the model name, and start the download.
And voilà! Now you can chat with your model.
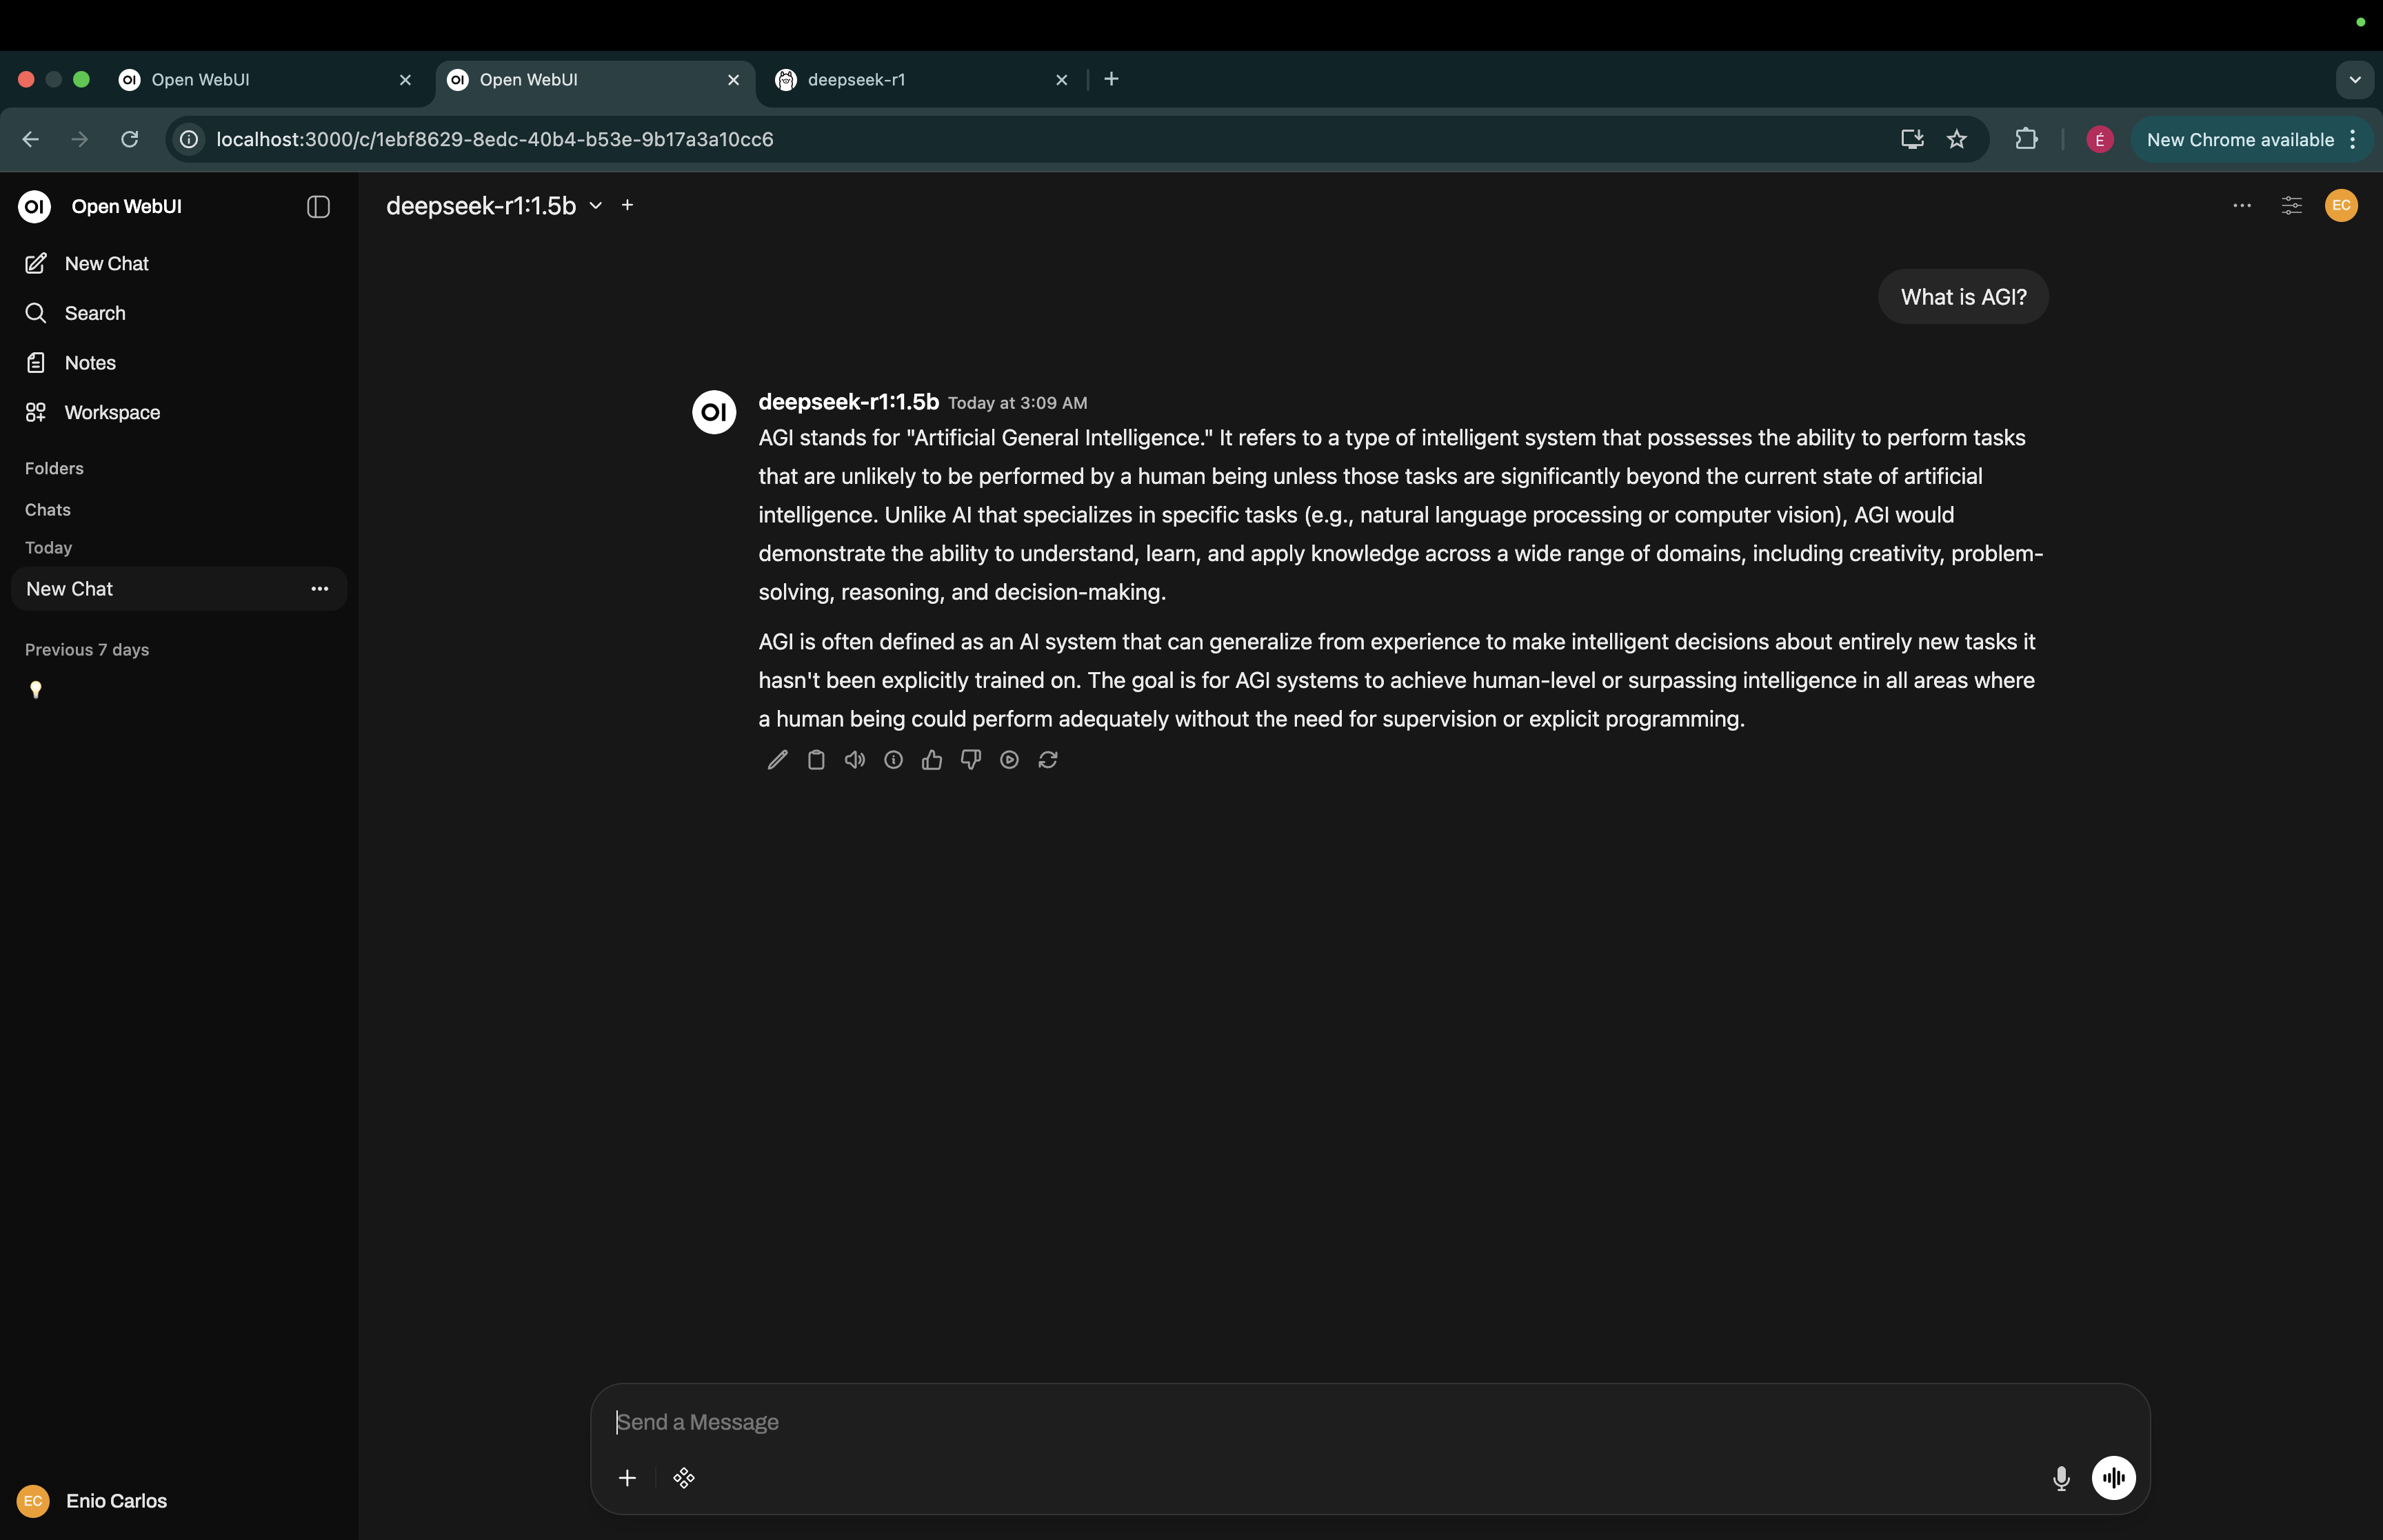
Finis
And that’s it! You’ve got your very own GPT running at home with almost zero configuration. Of course, if you want faster response times, you’ll need a GPU. But hey, if you’re happy with a slower setup, you’re good to go.
Now, if you feel like upgrading, maybe buy a GPU. But for now, enjoy your self-hosted GPT!
See ya!